Setup Swish for Gravity Forms
Get your certificates
If you do not already have a Swish agreement, visit https://www.swish.nu/losning/e-handel to get started.
Swish for Gravity Forms integrates directly with Swish, eliminating the need for a technical supplier adding cost and extra suppliers.
Log in to your Swish Portal: https://portal.swish.nu/company/login?redirectPath=%2Fcompany%2Fcertificates
With your merchant Swish agreement, get the authentication certificates. We will here need three files:
- Swish_Merchant_xxx.pem
- Swish_Merchant_xxx.key
- Swish_TLS_RootCA.pem
Due to security reasons, we have chosen to not allow for direct uploads of these key files, as WordPress installs sometimes have wrongly configured folder permissions which could lead to malicious actors downloading the keys and potentially issuing refunds for all transactions made. Instead, the contents of the files are stored in the database. Depending on your operating system, the exact procedures for copying the contents of the files can vary, but usually go somewhat like this:
1. Right click on the file
2. Open in Notepad or TextEdit
3. Copy all the text and paste it in the Swish for Gravity Forms settings
If you have any questions, feel free to reach out to athral@athral.com
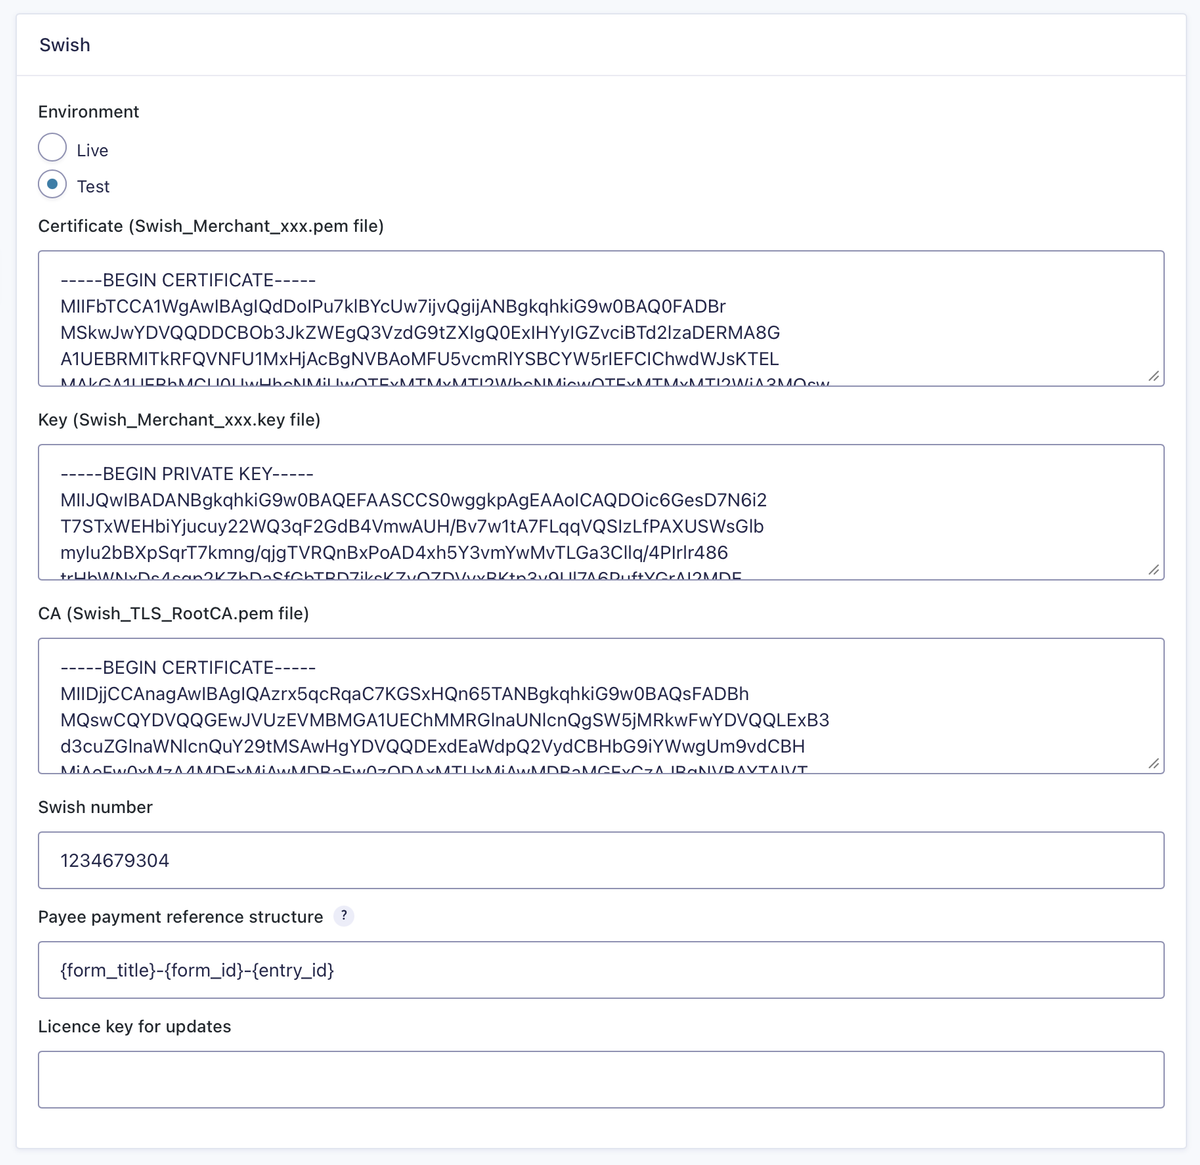
Remember to fill in your merchant Swish number and the plugin licence key for updates.
Configure your form
To enable Swish payments for your form, you into the form settings and find “Swish” in the sidebar. Here you will create a feed and configure all form-specific Swish settings. If you have previously used Stripe or other payment solutions in Gravity Forms, the process should be familiar.
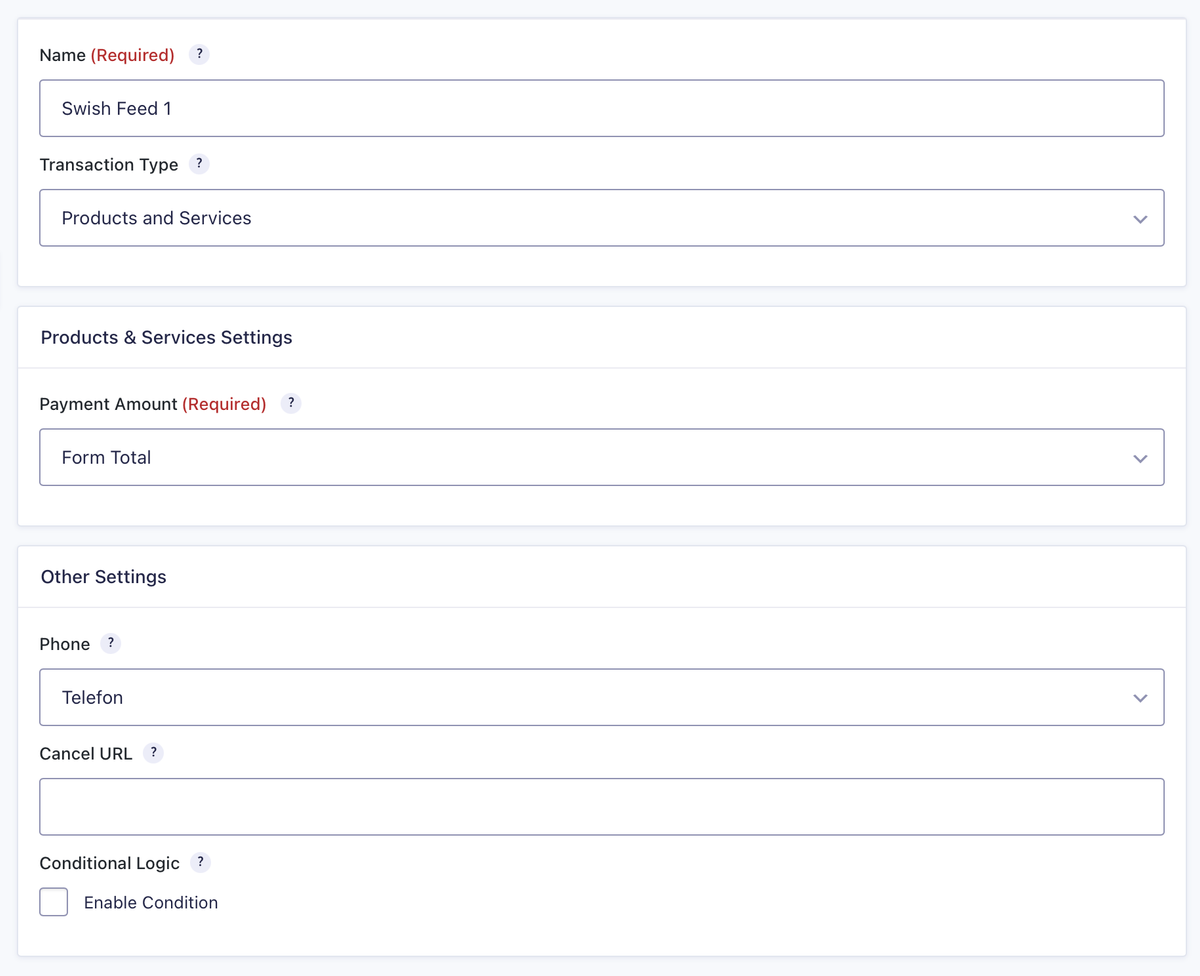
Make sure the field in your form for the phone number is mandatory, the Swish payment process will not work if the user has not provided their number.
If you have multiple payment methods for your form, use conditional logic to set Swish only to be used when certain criteria are met. The most common configuration is having radio-buttons with options for eg. “Card” and “Swish”, then setting the conditional logic to run if “Payment method” equals “Swish”.
Confirmations
Pages and redirects
Due to the fact we have to wait for the user to confirm the payment in the app, the Swish integration sends the user to a separate page where we continuously check with Swish if the payment has succeeded, been cancelled, or failed. Depending on that, we can redirect the user to separate pages, a success page when the payment goes through for example. All confirmations for the form must therefore either be set to "page" or "redirect". Create a dedicated page for successful pages that make it clear to the user that the payment has gone through.
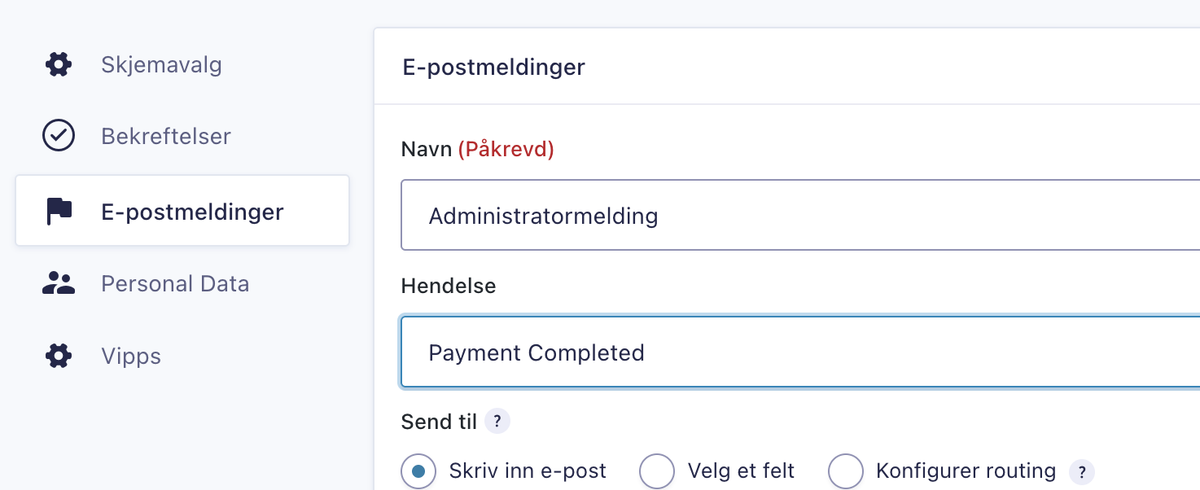
E-mail notifications
By default, e-mail notifications in Gravity Forms are set to be sent immediately after form submission, but due to the payment flow with Swish where the user has to complete the payment in the app, e-mail notifications should be set up to be sent upon a payment.
It is also recommended to use the e-mail confirmation as a payment receipt. Below is an example that includes the transaction ID, payment date and amount which is automatically populated by the merge tags used.
Transaction ID: {entry:transaction_id}
Date: {entry:payment_date}
Amount: {entry:payment_amount} kr
Make sure to also include the customer info as well as your business name, registration number and address for legal compliance.
Need help?
If you encounter any issues during setup, don’t hesitate to drop an e-mail to athral@athral.com.